X-COM: Terror from the Deep

X-COM: Terror from the Deep

126 ratings
Beginners Guide at TFTD
By {NLR} C´est Moi ;D
A guide written to help out new players to TFTD, hopefully making the game a bit more understandable and fun. Not meant to be a "do this, win" guide, just some advice from a veteran at the game, about do's and do-not's and getting started with the game.
Constructive criticism is appreciated.
3
   
Award
Favorite
Favorited
Unfavorite
Before You Start The Game
Before you start up the game and start playing, there's a few things I'd highly recommend you do.

1) Download XcomUtil, and run it. This is a program designed to fix a lot of bugs in the game, and improve the experience. Notable bugs it removes are the research sequence issues, where if you research an item at the wrong time, you're basically boned.
In addition to that, it can also alter several areas of the gameplay to your liking, like removing Psionics, improving tanks, improving your starting base and so on.
I'd recommend NOT using any of those on your first playthrough, apart from one, namely the buff to Dye Grenades. Why ? Because in vanilla TFTD, they're garbage, and serve no purpose. With this buff, they work like Smoke Grenades did in the original, meaning they're actually good and worth using. But I'll leave that to your discretion, what you chose to enable and don't.

So to summary that, get XcomUtil, have it fix all the bugs, improve the dye grenade, and leave it at that. If you later want to change your settings this can all easily be done, so don't worry about it.

2) After having done that, next you'll need to change a few settings for DosBox. Navigate to your Xcom TFTD folder. It can be found under Steam\steamapps\common\X-COM Terror from the Deep.
Here, you'll want to open the file called "dosbox.conf" with notepad, or another program similar to it.
Once open, scroll down to the section called "[cpu]".
These are what you want to alter.
Core should be =normal.
Cycles is a bit tricky to get right, but anywhere between 20000 and 40000 works for most people, you'll have to experiment with that yourself.
Cycleup and cycledown can be left alone.
Once that's done, save the file and close it.

What this'll do is make the game run faster. If you've ever seen gameplay videos of the game on Youtube, you've most likely noted that it runs very slowly. This changes that, especially notable on levels with more elevations.

3) This is optional, but I recommend it if you installed XcomUtil.
Navigate to Steam\steamapps\common\X-COM Terror from the Deep\TFD\XcomUtil and run the file "SteamSetup.bat". What this'll do, is make XcomUtil load when you start TFTD from steam.

With all this done, we're now ready to start up the game!
Getting Started
With all the boring stuff out of the way, let's start the actual game now! If you installed XcomUtil, you'll see this screen when you start TFTD from steam.
Normally, you'd want to just press 2 and start the game, but if you at any point want to change some settings in XcomUtil, for example disable Psionics, this is when you can do so easily.

Choose whatever language you prefer, then new game. Difficulty is completely up to you, although if you're new to Xcom in general, I'd recommend Normal or Easy. Keep in mind, many people consider this game harder than the original, so if you were able to beat the original on Veteran with ease, you may find Veteran here a bit more of a challenge.

The different settings basically alters how many aliens there are per mission and how good they are stats wise. On easy they're spraying their ammo all over the place, and on Superhuman they'll hit quite often and be tougher to take down.

Once you've chosen, you'll be taken to this screen
Now it's time to place your base. There are several good spots, and some not so good. Basically, what you want is somewhere that covers a fair bit of land, but also water. Since all regular missions are underwater, you'll need to keep an eye on it. I normally start right here, just west of Europe, covering a bit of America too.

Once you've named your base, immediately press the top button called "base". We're going to have to do some things before we can allow the game to start for real.
This is what it should look like, if you didn't choose the improved base option.
What you'll want to do here, is to make two new sub pens up next to top one, then make a Large Sonar Array, an Alien Containment, a Living Quarters and a General Stores, all underneath the top three rows. When you're done, it should look something like this.
Once the two top sub pens finish, demolish the two lower ones. Same with the living quarter, although you can keep that one if you like. I'd recommend not doing so, but it's up to you.

This design of your base will be expensive at first, but it'll pay off once it's all done. The reasoning behind this, is that should the aliens attack your base, they'll come mainly from the sub pens and the access lift. By default, this means that you'll be attacked from several locations, while with this design, you got a nice choke point to defend instead. Keep in mind though, that if there's too many aliens, and not enough sub pens, they'll spawn elsewhere in your base too.

Next up, we'll need to have a look at our soldiers. Click on "Aquanauts". This is where we'll be sorting the trash from the gems, so to speak. Click the top soldier and have a look at his stats.
In my case, we got Wolfgang Zander, an average at best soldier. There's quite a few stats to look at here, but what we're interested in are the following:
Time Units, Reactions, Firing Accuracy (FA) and Strength.
Time Units (TU's) determine how much any giving unit can do during their turn, so the higher the better. Reactions determine whether or not the unit in question can take a reaction shot (if TU's allow it) against an enemy taking action within range.
The other two are self explanatory.

A new recruit can start with anywhere between 50 and 60 TU's, 30 and 60 Reactions, 40 and 70 FA and 20 to 40 strength.

A quick note, some people rank their troops depending on their bravery stat, I say don't. Bravery determines how much morale loss the soldier suffers from events such as loss of an allied soldier and Psionic attacks. Every 10 points of bravery, reduces the penalties by 2 points. For example, a soldier with 10 bravery ( the minimum) will suffer a 20 point morale loss if a fellow recruit falls in combat. If he had had 60 bravery (highest starting value) he'd only have lost 10 morale.
This may seem like a great deal, but it only matters much in the early game and if you lose soldiers left and right. Once you get a high ranked soldier, his pressence on the battlefield alone reduces the morale penalties.

Of course, how you value your troops is up to you. Look through your initial supply of troops and see what you've got. If you want you can name them depending on their stats, like Heavy if high strength, Sniper if high accuracy and such. Up to you how you do it.
I personally use three categories. Scout, Skirmisher and Sniper.
Scouts are the worst soldiers, and often die first. Skirmishers are the average ones, and can be both accurate and cannon fodder. Snipers are the most valuable troops, and as such, are kept out of harms way if possible.
Getting Ready For Combat
With that all said and done, it's time to check out our Triton. Go to "Equip Submarine" and select the Triton-1. You should see this
This is where you'll be changing who goes to the missions, what they bring and what armor they're using. However, since we neither have more troops nor any armor, we'll just look at the gear.
As you can see, the Triton has already been armed with a bunch of equipment for us. However, as one might imagine, some of it is not really all that great. To be more accurate, some of it is garbage.

What you'll want to do here, is to remove all the Dart Guns and matching clips, and half of the Jet Harpoon clips, bringing it down to 6. Then bounce another Gas Cannon over.
If you improved the Dye grenades, take all of them onboard too.
The Hydro-Jet Cannon is pretty bad, the Dart Gun is laughably weak and the Torpedo Launcher is mediocore at best with the small torpedo.
The Jet Harpoon is a very light weapon and one of the few with Auto Fire potential. It's not all that accurate though, and a bit weak, but it's okay in the start.
The Gas Cannon is going to be your default weapon, due to its impressive fire power and abillity to use HE rounds.

The Magna-Blast grenades are pretty weak, but they'll make do until we get the upgrades.

Click ok, we're done here for now.
Next up, click on one of the Barracudas you have, then click the second weapon slot for it and select Ajax. Should look like this when you're done.Go do the same with the other one, only select D.U.P. Head on this one instead.

If you want to, you can wait with rearming one of them till after the first one finishes, in case something shows up that needs to be shot down.

Once you're done there, go back to base view and select "Sell/Sack"
Sell everything as shown. If you wish, you may keep the Torpedo Launcher, but I'd advice you to not use small torpedos. If you wish to keep it, hang onto them for now though.

With all of this done, we should have around 2 million$ left to work with. Go to "Purchase/Recruit" next. Here, we'll buy quite a few things. Firstly, either buy 2 or 6 aquanauts, depending on whether or not you want to bring a tank along. If you go for the tank, remember to buy ammo for it. A minimum of 8 Aqua Jet Missiles are needed for the Aqua Jet tank, and 30 Solid Harpoon Bolts for the Gas Cannon one. I'd advice the Gas Cannon tank, since it can be used both on Land and underwater, where the other is underwater only.

Next, buy either 8 or 12 Gas Cannons, depending on if got the tank or not. Then matching amounts of both AP and HE rounds, plus some spares. If you kept the Torpedo Launcher, get one less Gas Cannon and instead buy some Large Torpedoes. Next up, we'll want 5 more Magma Blast Grenades and, if Dye Grenades are improved, around 20 of them. If you want, you can get some Particle Disturbance grenades too, they're basically proximity grenades. Just avoid stepping on them yourself.

Next on the list, we'll want either 10 or 14 Chemical Flares, again depends whether or not you got the tank. This is in case we get a night mission. Then the same amount of Thermal Tazers.

Then we'll want to get 3 D.U.P. Head Launchers and as many torpedoes as possible.
Finally, get 10 Scientists. This should leave you with around a million left to work with. If you want to, you can buy some more ammo for your weapons, and some more aquanuats, or even some more scientists.

Next up, head on over to "Research", we ain't done just yet. Select "New Project" and have a look.
These are the three choices we have. Lets see.
Medi-Kit, no. We have no use for this currently. Until we get armor, consider any hit taken a dead soldier. If they survive, it's a miracle.
Particle Dist. Sensor. This is one of two good choices in the start. It's a device that'll show movement in a certain range upon use. Useful in some situations, but early on, it serves as a way to make money.
Gauss Technology. I normally skip this, since it's not really all that great. It has Auto Fire on pistol and rifle, but the clips are fairly small. 20 and 15 respectively. The damage is decent, but it's only good against two enemies, Aquatoids and Gilmen, both of which the Gas Cannon kills just fine, if not better. Another issue is that you have to manufacture all the ammo yourself. When you need to upgrade your weaponry, you'll upgrade to sonic instead.
Some get it so they can make Gauss cannons down the line to sell for profit, others use them. Up to you if you want this or the other researched first, neither are really "great", but they both serve their use.

Once you've chosen and allocated your scientists, we're finally ready to start the actual game!
First USO Sighting
Once back on the Geoscape, it's time to let time fly by. Using the 6 time options, choose which speed you want. The faster the option, the faster something happens.
After a little while, hopefully you should see something similar to this pop up
Huzzah! Enemy contact! Center on it, and select the "Intercept" option to the top right. Select either of your Baracudas and target the USO.

After a little while your Baracuda should catch up to it, and this'll appear.
It looks more complicated than it really is. To the right we have the different options for interception. From Left to right, then going down a row, it's Standoff, Cautious Attack, Standard Attack, Agressive Attack, Disengage and View USO. In the top left, you can minimize the window if you've selected Standoff. This'll allow you to engage it with several Intercepters at once. For this one though, we wont need that.
The large image reflects how much health your Intercepter has left.
A quick rundown of the options.
Cautious Attack means you'll stay at the longest range one of your weapons can fire, Standard Attack means you'll stay at the longest range both weapons can fire, Agressive means you'll go as close as possible, this one endangers your own ship more than the others, however it'll shoot faster. Disenage is obvious and View USO gives you a picture of the USO you're up against.

After a little while, you should down the USO with little issue.

Great! Now go to Intercept again, and select your Triton, then select the crash site. If anything has arrived, make sure to equip it first. Else, just go for it! If you want to, now is an ideal time to save your game if you don't want to play it Ironman style. Personally, I recommend playing Ironman style, basically meaning no reloading, no matter what happens. Makes the game more fun and intense, but it's all up to you.
Once your Triton arrives, get ready for action!
First Battlescape Mission
Once your Triton has arrived at the crash site, and you've clicked ok to start the mission, this screen will appear.
Now it's time to equip your troops with their gear. If you need to, clicking the icon in the top left will take you that soldiers stats, in case you need to see his strength or something. Remember to distribute the items, and load any HE rounds into a Gas Cannon prior to clicking OK.

Once you're ready and satisfied with your loadout, click OK.

Unfortunately for this guide, I had a rather rare event happen where all the aliens died in the crash. In that event, this screen will show up.

Fortunately, I reloaded and tried again, and this time, they didn't all die. So let's continue, shall we?
As the mission begins, this is what you'll see. Your men are all safe within the Triton, so there's no need to panic. Yet. You can open the door by just right clicking behind it, saving you TU's and avoiding getting shot at as you exit the Triton.
In your first turn, you'll want to throw some smoke cover outside, incase someone is hiding nearby. Ideally, you don't want to do too much movement outside during the first turn, since all the aliens will have full TU's to take reaction shots at you.

Let's have a look at the UI though, shall we ? Starting from the left, we'll work our way right.
First, we have Left hand slot, empty in this case, then two buttons to control movement up and down (if you're standing on a lift or using specific armor), then two buttons to controll what level you're looking at currently, then a map, under which we find a Kneel/stand button. Next to that is the inventory button, below which we find a center on active troop. The two next to that swaps to the next active soldier, the only difference being the lower one remove the current soldier from the "active soldier" pool, meaning you won't get that guy again. Then we have toggle ceilings, and options. Finally, we have end turn, abort mission and your right hand.
Lastly, we have TU options. The first one, simply sets the TU's the soldier to 0, no point using it. The next 4 reserves TU's for either nothing, a snapshot, an aimed shot or auto fire. The last one reserves for kneeling. Then you have your soldiers rank, TU's, Stamina, Health and Morale.

With that all said and done, let's get that smoke cover going!
Open the inventory of your soldier, select the smoke grenade, and put it in his empty hand. Close the inventory, click on the grenade, prime it for 0 turns and then throw it out in front of the door.
The priming duration is how many turns until it explodes. 0 is the end of your turn, 1 the end of the aliens, 2 the end of your next turn etc. You can carry around a grenade primed at 0 turns for as long as you like. It'll only explode once you throw it.
Once the grenade has been thrown, either move out one or two guys, not too far, and/or end the turn. Remember to kneel with them, it makes them harder to hit, and gives them a bonus to accuracy.

If it's a night time mission, your vision will be drastically reduced, so be extra careful, especially if you don't have flares. If you see shots coming from the darkness, you know roughly where the aliens are. Remember to use grenades if needed, explosives are your friends.

In my case, the aliens killed one of my guys, but I managed to locate the alien the next turn. The scout did what he was meant to do, now it's up to the rest of my guys to kill the alien.

Since no two missions ever play out the same, and I want you to actually play the game yourself, I'm going give you some basic advice and then let you loose on this mission on your own.
Firstly, don't overextend. It's important, more so in night missions, that you stay relatively within range of your other troops. Although, you don't want to stack up too much, since the aliens WILL use grenades against you. Use smoke to your advantage, vision is everything. If you suspect an alien is hiding somewhere, but you can't get to it, use explosives if possible.
If an alien gets a shot off at you, you'll want to ideally, kill them on your next turn if possible. Don't let them get more shots off than absolutely necesarry.
Friendly fire is very much possible, so be vary of the line of fire to your target, and move troops out of the way if possible.
Finally, don't ever assume that last alien you killed was the last of them. It can end in pain when they pop out and kill your guys because you didn't move any more troops.
Above all else, have fun!

A little advice too, to help out.
Placing troops on the wing in that spot right there, means they can shoot over the triton, but are safe from shots coming from the other side. Just remember to Kneel when done shooting, and stand before shooting.

Also, always have a "what if" mindset when doing your move. It's probably not the best of ideas to move your last soldier into a room all on his own, or betting everything on one shot. Have a plan B if the first one fails, or provide unexpected results.
Returning From A Mission
When you've killed all the aliens at the crash site, you'll be greeted with a lovely screen showing you your score, your casualties and how much stuff you recovered/killed. In my case, it was a very small scout, so there was only one alien. This means I got less loot, but an easier mission.

After that screen, you'll be shown who got promoted, if anyone, and then it's back to the geoscape. Depending on what happened down there, you may need to restock on Aquanauts, supplies or just pass some more time.
However, in this case, I'd advice you to look at your research tab, to see what you recovered.
Sadly in my case, I didn't get any Sonic Pulsers, which is what I really wanted. I did get a pistol, a clip, a corpse and Magnetic Navigation.
In this case, I'd swap the research to Magnetic Navigation, since that'll allow us to make the Transmission Resolver down the line, which will catch all USO activity in range. If I got the Pulser, I'd get that first, then the Navigation.

However, now you should be able to continue playing the game on your own. When the supplies arrive we ordered earlier, remember to equip the Triton and Baracudas with them, and assign the scientists to the research. Eventually, you'll need to buy some engineers too, but first when you can produce something, else they'll just eat money. Also remember to sell off your Ajax launchers and torpedoes in addition to the Jet Harpoons once they've been replaced.

In case you're wondering why I recommened HE rounds in your Gas Cannons, it's very simple. In the early game, more so than late game, your troops will have the worst possible accuracy, so you'll want to maximize the chance to kill the target. HE rounds means that, even if you should miss the target, you'll have a higher chance to kill either it, or someone else nearby, with the AOE of the explosion. The only tradeoff is that you need to be a bit more vary of friendly fire and panic.

So have fun, and remember, losing is fun in this game!
If you feel I need to cover something else in this guide, do tell, and I'll see what I can do. I just feel this is enough, since I don't want to start playing for you.
Notes on Armor
Depending on whether or not you've seen people play this game before, you may or may not have seen that some people don't give out armor to rookies or only give out "good" armor to highly ranked troops. While this might seem smart in theory, it's a bad, bad idea. Reason being, with armor, even just the very basic Aqua armor, the survival rates increases drastically.

Let me show you what I mean.
Your default diving suit, gives you 12 armor from the front, 8 to the sides, 5 from behind and 2 from underneath. Doesn't really sound that great, does it ? It'll save you from harpoon maybe, but that's about it.

Now let's look at Aqua armor, the very first one you get your hands on.
Look at those numbers! Much, much better! How does this help ? Well, you see, every point of armor you have, subtracts one point of damage should you be hit from that angle. If you get hit from the front here, you'll take 60 less damage, that's an improvement of 48 from your default armor! Given that weapon damage in this game is highly random (0-200%, unless explosive, in which case it's 50-150%) every single point you can get matters.

But, let me show you better what I mean. Here are the main weapons you'll be up against.
Since actual weapon damage is displayed on the ammo, here is the clips for the three main alien weapons.
The Sonic Pistol
The Sonic-Blasta Rifle
And the Sonic Cannon

Taking our previous knowledge into account, we can see the pistol deals anywhere between 0 to 160 damage, the rifle 0 to 190 and the cannon 0 to 260. That's quite nasty.
Now you may be saying, "that's nice and all, but why should I care ?" Well, lets assume that we have a new recruit. He happens to have 26 health, one over minimum health. If he was to take a shot from each of these weapons, with the different armors on, we'll quickly see just how big a difference it makes.
If he's not using armor, and takes a shot from the front, he'll survive 23% of the time vs the pistol, 19% vs the rifle and a pityful 14% vs the cannon.
You may now say, "those numbers aren't that bad!". No, they aren't. But keep in mind, this is from the point the armor value is strongest. If he was hit from behind (where it's weakest) he'd only survive 18%, 16% and 12% of the time respectively. But wait, what about the armor value for underneath ?! That's only for explosives, or if you're flying around, so no need to worry about that now.

Now, had he been using Aqua armor, his chances of surviving would have increased to 53%(!!) vs pistol, 45% vs rifle and 33% vs cannon. That's a huuuge improvement! Let's look at it if he got shot from behind instead. Then it would be 34%, 29% and 21%. Still an improvement all around!

And just to complete it, if he was using Ion armor, he would instead survive 98% of the time against a pistol (YES, 98% of the time!), 83% of the time against rifles and an amazing 60% against cannons!
If shot from behind, it's still an impressive 78%, 66% and 48%! Altho, Ion armor is stronger from behind than from the sides, so to take the weakest point into consideration, that's still 59%, 50% and 37%

So to conclude, while armor may seem expensive and it seems smart to not use it on rookies, it's all worth it using it on as many troops as you possibly can. And, if you expect to take a shot during a turn for whatever reason, try to face the offending alien, to maximize your chances of surviving!
Terror Missions
In TFTD there are a total of five different terror missions, giving a wider range of variety in the everyday lovely terror time that is almost always going to happen every month, in the early days. In the first month the terror mission will be late on, and in future months, usually happen within the first week or so. Some terror missions can be prevented by shooting down the USO's causing the terror, while others are "scripted" to happen, and can't be prevented.

Let's go over the different types real briefly, to give you a rough idea of what to expect, how it plays out and if you're equiped well enough to deal with it, should it appear.

I place them into three categories.
1: Land Missions (Port Attack and Island Attack)
2: Ship Missions (Cargo Ship and Luxury Liner)
3: Artefact Sites (Artefact Site)

I rate them, difficulty wise, if we imagine they all had the same aliens (where possible, artefact sites always have the same alien setup, the others don't) as Land Missions being Easy to Medium, Ship Missions being Medium to Hard and Artefact Sites being Hard to Brutal.

If a terror mission should appear that you don't want to deal with, or don't feel you're able to deal with, DO NOT IGNORE IT. Instead, send your triton there and then instantly abort the mission. You'll lose less points this way. If you just ignore it, you'll lose about 1000 points as opposed to just around 200~ or so, dependant on how many civilians the mission had. If you manage to snipe an alien or two first, that's just a bonus.

It's worth noting that Shipping Missions always use the same maps, so if you've played them a few times, you know where to expect aliens and what routes to take for optimal play.
Land Missions
Land Missions are fairly open maps, that often contain large open areas, with little to no cover or options to hide, as well as a lot of spots from where the aliens can shoot you from easily as you try to move about the place.
Of the two, the Port Attacks are the most difficult ones, because they have a lot of buildings with windows, several floors and a bunch of towers the aliens like to hide in and shoot you from. The difficulty is heavily dependant on where your triton spawns on the map, and what appears next to it. If your triton is in the lower parts of the map, you're generally going to have an easier time mobilizing, as opposed to being at the top of the map. The downside is you could risk having a big storage building just behind the triton, in which aliens like to hide and shoot you from, making it difficult to get map pressence.

Island Attacks are the easiest of the two, but they can still have some nasty surprises in them. Typically, an Island attack will have one big hotel building in the middle, or near the middle, and a bunch of smaller houses scattered around as well as an elevated area to the bottom left side of the map. Island Attacks are sometimes plagued with a bunch of small tunnel areas under hills, that spiral inwards, in which aliens love to hide, which can make it difficult finding the last alien or just getting it killed without losing too much, seeing as in order to see it, you have to standing right next to it, making yourself prone to reaction fire. A grenade will lure it out most of the time.
Ship Missions
Oh boy, it's everyones favorite type of terror missions, the Ship Missions. I'm probably going to get a lot of flak from saying this, but they really aren't that bad as a lot of people like to think. Yes they can be hard if you're unprepared, yes they're long and yes they have a lot of places to explore. But, that's how most maps work in this game, so it's nothing new or surprising. I'm happy to admit that I actually like them. I think they're fun to play, it's a nice change of scenery, and they can be over in under an hour if you know what you're doing (even against harder enemies).

Cargo Ship: This is probably the easiest of the two. The first stage to this mission is only two stories tall (with the exception of a tower) and half of it is indoors, in tight close areas, making it easier to hit enemies and prevents getting sniped from across the map. The map contains a lot of containers, but on this level, none of them normally contains any aliens, so they're safe to ignore or use as cover/shelter. I'd advice to sweep the lower decks first, then make your way to the upper decks from all the possible access points, to ensure nothing attacks you from behind.

The second stage is where things can get a little tricky, and this is where if you haven't done the optimization I recommended early on, you'll notice a severe decrease in game speed.
This stage spawns you in a relatively safe area, but the downside is that just outside it, is a huge open area, with aliens often waiting on the upper levels, shooting you if you try to charge out. Fortunately, there's a bunch of containers to your left that can be used as cover, and as a method to advance more safely. One of the containers (middle row top container) often spawns either an alien or a civilian, so if you're looking for that last alien, consider checking there to speed things up. Overall though, once you get a foothold in the map, and are able to move freely in the initial area, the rest isn't too bad. Just take it one level at a time, making sure to sweep everywhere and moving in teams. Then just move up as you clean them, and you'll be done in no time.

Luxury Liner: This is the hardest of the two. Both stages to this mission have four levels to them, as opposed to the cargo ship where it's 2/4 levels. Still though, if you take a methodical approach to the mission, you'll be able to beat it without too many losses and without it dragging on for too long.

The first stage is probably the easier the two. Your ship spawns in a small open area, with a door just below you, and a staircase behind it. The door leads inside, and the stairs up on the deck. Getting out of the triton can be a little tricky sometimes, because aliens can spawn on the deck around the triton, and will shoot down on your troops as they try to leave. Either snipe them back before mobilizing fully, or drop a few dye grenades and move in the cover of smoke, and you'll be fine. Completely opposite of what the cargo ships insides offered, the inside area of this ship is a lot more long corridor than it is narrow halls, so you can get into fire fights in them easily and have shots fired at you as you move troops. This goes both ways though, and it means it's easier to cover all potential angles the enemies can come from. There's also a bunch of rooms on this level. Sometimes they contain aliens, others they don't. Opening the doors real quick to check is the best approach. This level does contain a fair amount of elevators, so be cautious as you move around, or use them to your advantage.
Once you secured the lower parts, you'll have to move up to the deck, and this part is a lot more difficult, since aliens can snipe you from above easily, and you'll have a hard time shooting back during your turn. This is where the elevators can come in handy, if you don't have grenades or don't feel daring.

The second part to this mission, is borderline brutal at the start. Right from the get go on this stage, you'll be under fire from a lot of aliens. Both from above and straight ahead. You spawn in a cargo section of the ship, and there's a bunch of boxes just in front of the spawn to hide behind (they can break easily though, be warned) and a lot of spawning locations are scattered around in them. On top of that, right above you, there's a nice catwalk that aliens also like to spawn on, and they will shoot you from up there. In addition to that, there's an elevator that leads up and down between the two levels, a staircase to the top left and a door to the top right. The door leads to an empty area, but you can shoot through the walls if you have powerful enough weapons, to make another entry point to the rest of stage. The staircase leads to a door that acts as the main entry to the rest of the stage. There are, once more, four levels to this stage, although in all my games I've played, I've rarely seen anything spawn on the top two floors. It can happen, I've seen it happen, but it's seemingly very rare. So treat it as a two level mission first, and if you're still not done and you're sure there's nothing left on the two lower levels, move up and sweep the top two levels.
Artefact Sites
The Artefact Site is without a doubt, the hardest terror mission you can get in this game. And whatever you do, DO NOT IGNORE IT. Never ignore an artefact site, it'll cost you 2000 points of score if you do so. Just go there and abort mission if you don't want to deal with it. You'll lose around 750 or so from it, but it's much better than 2000.
On the other hand, if you succeed at this mission, you'll get a huge amount of points from it. It is very difficult though, so only attempt it if you're prepared. Fortunately, these missions only start showing up mid to late game, so you'll have time to gear up.

There are no civilians present on this map.

Once more, they're two stage missions. These ones on the other hand, as opposed the shipping missions, or even the land attacks, will always have the same aliens present, so you'll always know what to expect when you go into it.

The first stage takes place on the seabed, and contains a fair amount of open area, but also tower like buildings scattered around that aliens hide in and take shots at you from. In addition, there'll always be flying enemies on this level (tentaculats) so be warned and try to not split up your troops too much or move too fast. Your goal on this stage, unlike other terror missions, is to either kill all aliens on the level OR to just get to exit zone with all your troops and move on the next stage. The exit zone is hidden in one of the buildings, so finding it might take some time, but if you're just trying to rush the mission, it's a very viable method of doing so.

The second stage takes place inside, and this is where things get really deadly. Lots of fairly open areas, a huge open central area with a lot of balconies for aliens to hide on and a bunch of hiding spots for tentaculats and other nasties. Your goal here is to enter the central area, and destroy the synomium device (it's a silvery object, very easy to spot) which is always place up against a wall on the top floor, in between two collums. After taking it out, you can leave and the mission is succesful. Or you can kill everything. Up to you.
55 Comments
{NLR} C´est Moi ;D  [author] 22 Nov, 2023 @ 12:08pm 
Not by much no, afaik all sneak AI does is just make it so they try to avoid ending their turn where they're visible to you, but it didn't really change how aggressive they were from when I tried it out.
DeadSpace47 22 Nov, 2023 @ 12:06pm 
l meant the grenades behaving as normal but l like that you mentioned the Ai, Because l didn't know. Does sneaky make them less aggressive?
{NLR} C´est Moi ;D  [author] 22 Nov, 2023 @ 12:02pm 
And yes, your weapon selection is less great early on, and as such can feel like the game is unfair. Gas cannon is a great early weapon, same with grenades/sonic pulsers
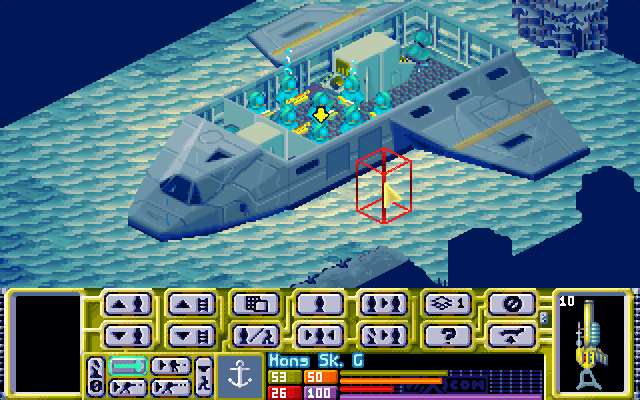
Lobstermen are easily defeated with either melee (drills can one shot them) or a few shots with the sonic cannon, they're really the most scary if you're caught unprepared with sonic rifles/non-sonic weapons.
{NLR} C´est Moi ;D  [author] 22 Nov, 2023 @ 12:02pm 
They don't behave the same. In Openxcom TFTD, the aliens are a lot more aggressive and actively moving towards you. Depending on what map you're on (alien base, artifact site, some USO crash sites and some terror sites), you'll be swarmed as landing and can more or less kill everything by just passing your turn, looking out, shooting the aliens that have run towards you, and repeating. You can't deploy safely because you'll get swarmed if you try as a result, so you have to just keep waiting.
I've won artefact sites, terror missions and supply ships before I even had a chance to leave my triton/initial deployment area because of it.
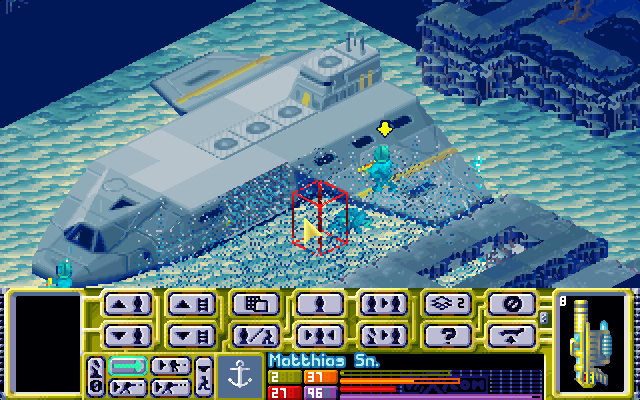
It's really bad on some maps and not at all how it behaves normally.
DeadSpace47 22 Nov, 2023 @ 7:54am 
Now l notice with OpenXcom, they behave like in the original, as intended. l notice the second game is really against the player. It is one of those games that hates its player, you can really feel the pressure the games does against the player. Weak weapons, powerful enemies that can be somewhat defeated with specific weapons in mind(Lobster). Though it is nice to have challenge, having the sea weapons like the rocket launcher unable to used for land missions is a like a slap to the face. Really limiting unlike the original and the prime example of the game hating the player is right there at the dart gun. You can notice the purpose of something if you observe the small details(dart gun)
{NLR} C´est Moi ;D  [author] 22 Nov, 2023 @ 7:24am 
I'm pretty sure it does yea. It's gotten a lot better over the years, tho it does play differently (the ai behaves differently)

The dye grenade in regular vanilla takes several turns to actually work properly if at all, severely limiting it's use
DeadSpace47 22 Nov, 2023 @ 1:35am 
Does OpenXcom have the fix for the dye grenades? And what kind of problems Dye has?
Mapno, the Good Luck 10 May, 2018 @ 6:37pm 
Good guide and all, there is only one thing which is kind of outdated. Do not only use Xcomutil, although it brings a bunch of fixes and life quality changes, it does not compare to openxcom nightly, which combines ALL bug fixes from various things like xcomutil, makes the UI easier to use and it also makes it easier to mod the game. Here is a video to it: https://youtu.be/L1WUpX9n7gY
DF_Shadow 21 Jul, 2017 @ 10:14am 
Thanks!
Excellent guide :D
C0untzer0 19 Jun, 2017 @ 5:47am 
Good guide. Best advice from a 20 year vet to all rookies is this:
"Don't be afraid to be afraid"
Seriously if you go to an early crash site and see a Lobster, bugging out is a sensible option. Nobody expects you to win every mission and it's important to choose your battles so that at least some of your main team is alive when the high priority/terror mission come in.