Alien: Isolation

Alien: Isolation

609 ratings
Alien: Isolation maps
By AstalaYstalawa
Alien: Isolation maps: Campaign, Survivor mode, Salvage mode and The Nostromo.
- All maps revamped 2024.
- Icon-free (no legend) maps added.
- Campaign: Sevastopol transit overview map added.
4
3
16
2
2
2
   
Award
Favorite
Favorited
Unfavorite
Salvage mode maps
- Safe Haven
Gemini Secondary Systems, Bacchus Apartments

- Lost Contact
Lorenz Private Wards, S6 Emergency Power Plant, UPS Core
Survivor mode maps
- The Basement
Basement, Main Floor
- Corporate Lockdown
Severance, Scorched Earth, Loose Ends


Corporate Lockdown: Severance


Corporate Lockdown: Scorched Earth


Corporate Lockdown: Loose Ends
- Trauma
Reoperation, Crawl Space, Overrun


Trauma: Reoperation


Trauma: Crawl Space


Trauma: Overrun
- The Trigger
Damage Control, The Package, Blast Seat


The Trigger: Damage Control


The Trigger: The Package


The Trigger: Blast Seat
The Nostromo maps


- Crew Expendable
A Deck, B Deck, C Deck, Primary Air Shafts
- Last Survivor
Shuttle Docking Bay, C Deck
Campaign Transit Overview
- Sevastopol Transit Map
Campaign Maps
- The Torrens
A Deck
- Sevastopol Spaceflight Terminal
Arrivals and Departures, Security, Freight Shipping - ID tags: 2
- Lorenz Systech Spire
Lobby and Technical, Upper Level, Lower Level - ID tags: 6


Lorenz Systech Spire: Upper Transit
- Seegson Communications
Monitoring Rooms, Observation Deck, Central Communications - ID tags: 6
- Sevastopol Scimed Tower
Transit Station, Maintenance Deck - ID tags: 3
- San Cristolbal Medical Facility
Primary Care Floor, Maintenance and Morgue - ID tags: 4


San Cristolbal Medical Facility: Crisis Stabilization Unit - ID tags: 5
- Seegson Synthetics
Synthetic Storage, Facility Observation, Maintenance Vents - ID tags: 2


Seegson Synthetics: Synthetic Fluid Plant


Seegson Synthetics: Seegson Synthetics Administration - ID tags: 2


Seegson Synthetics: Android Orientation - ID tags: 2
- Gemini Exoplanet Solutions
Manufacture and Distribution, Upper Floor - ID tags: 1
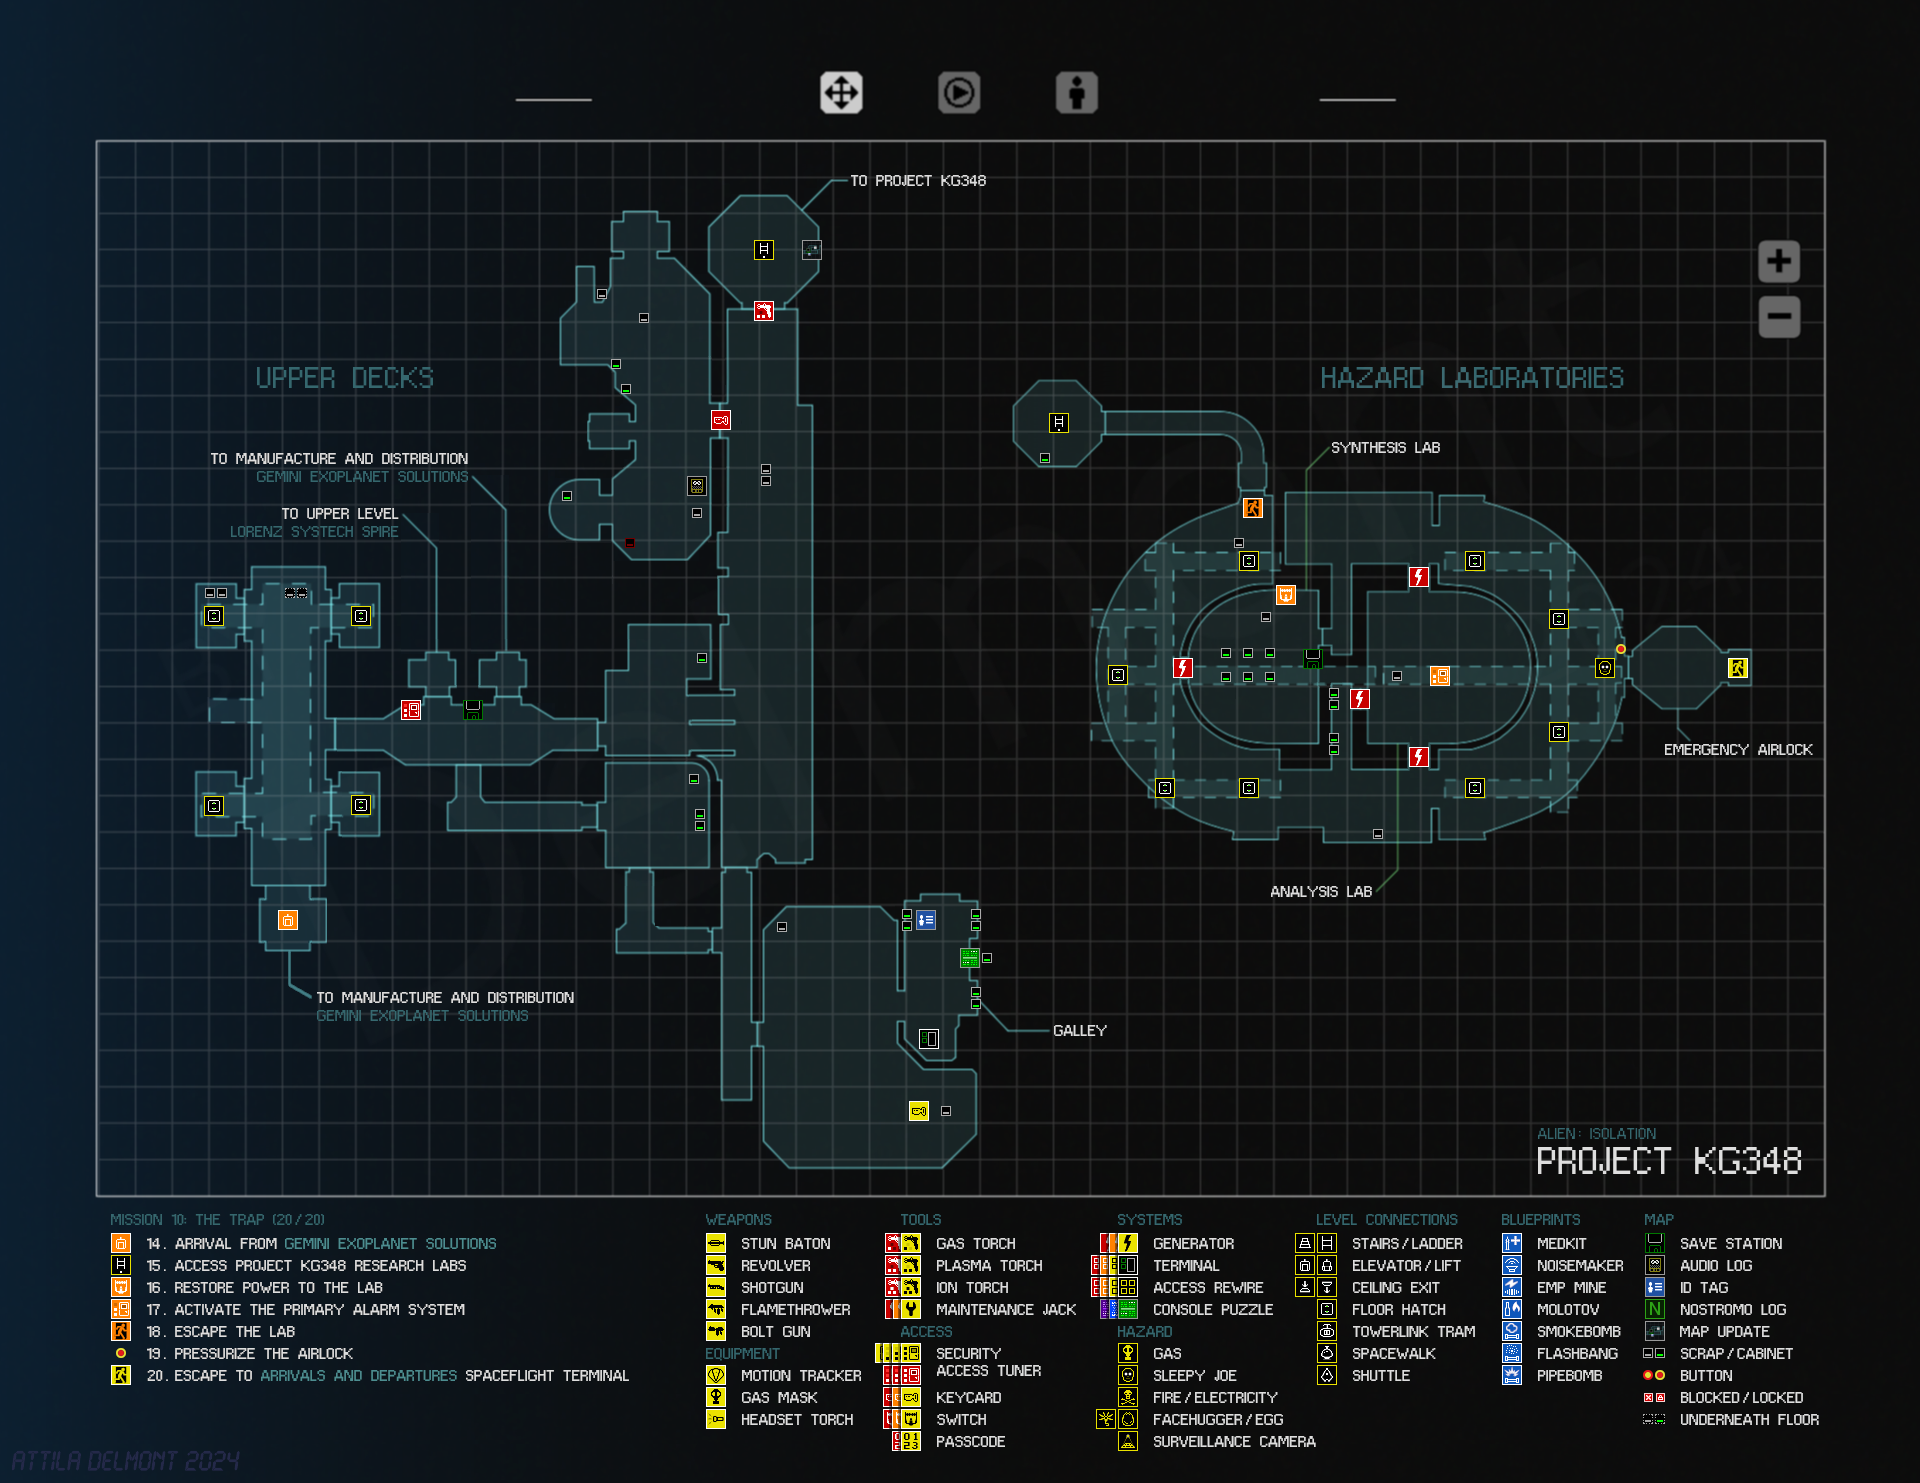
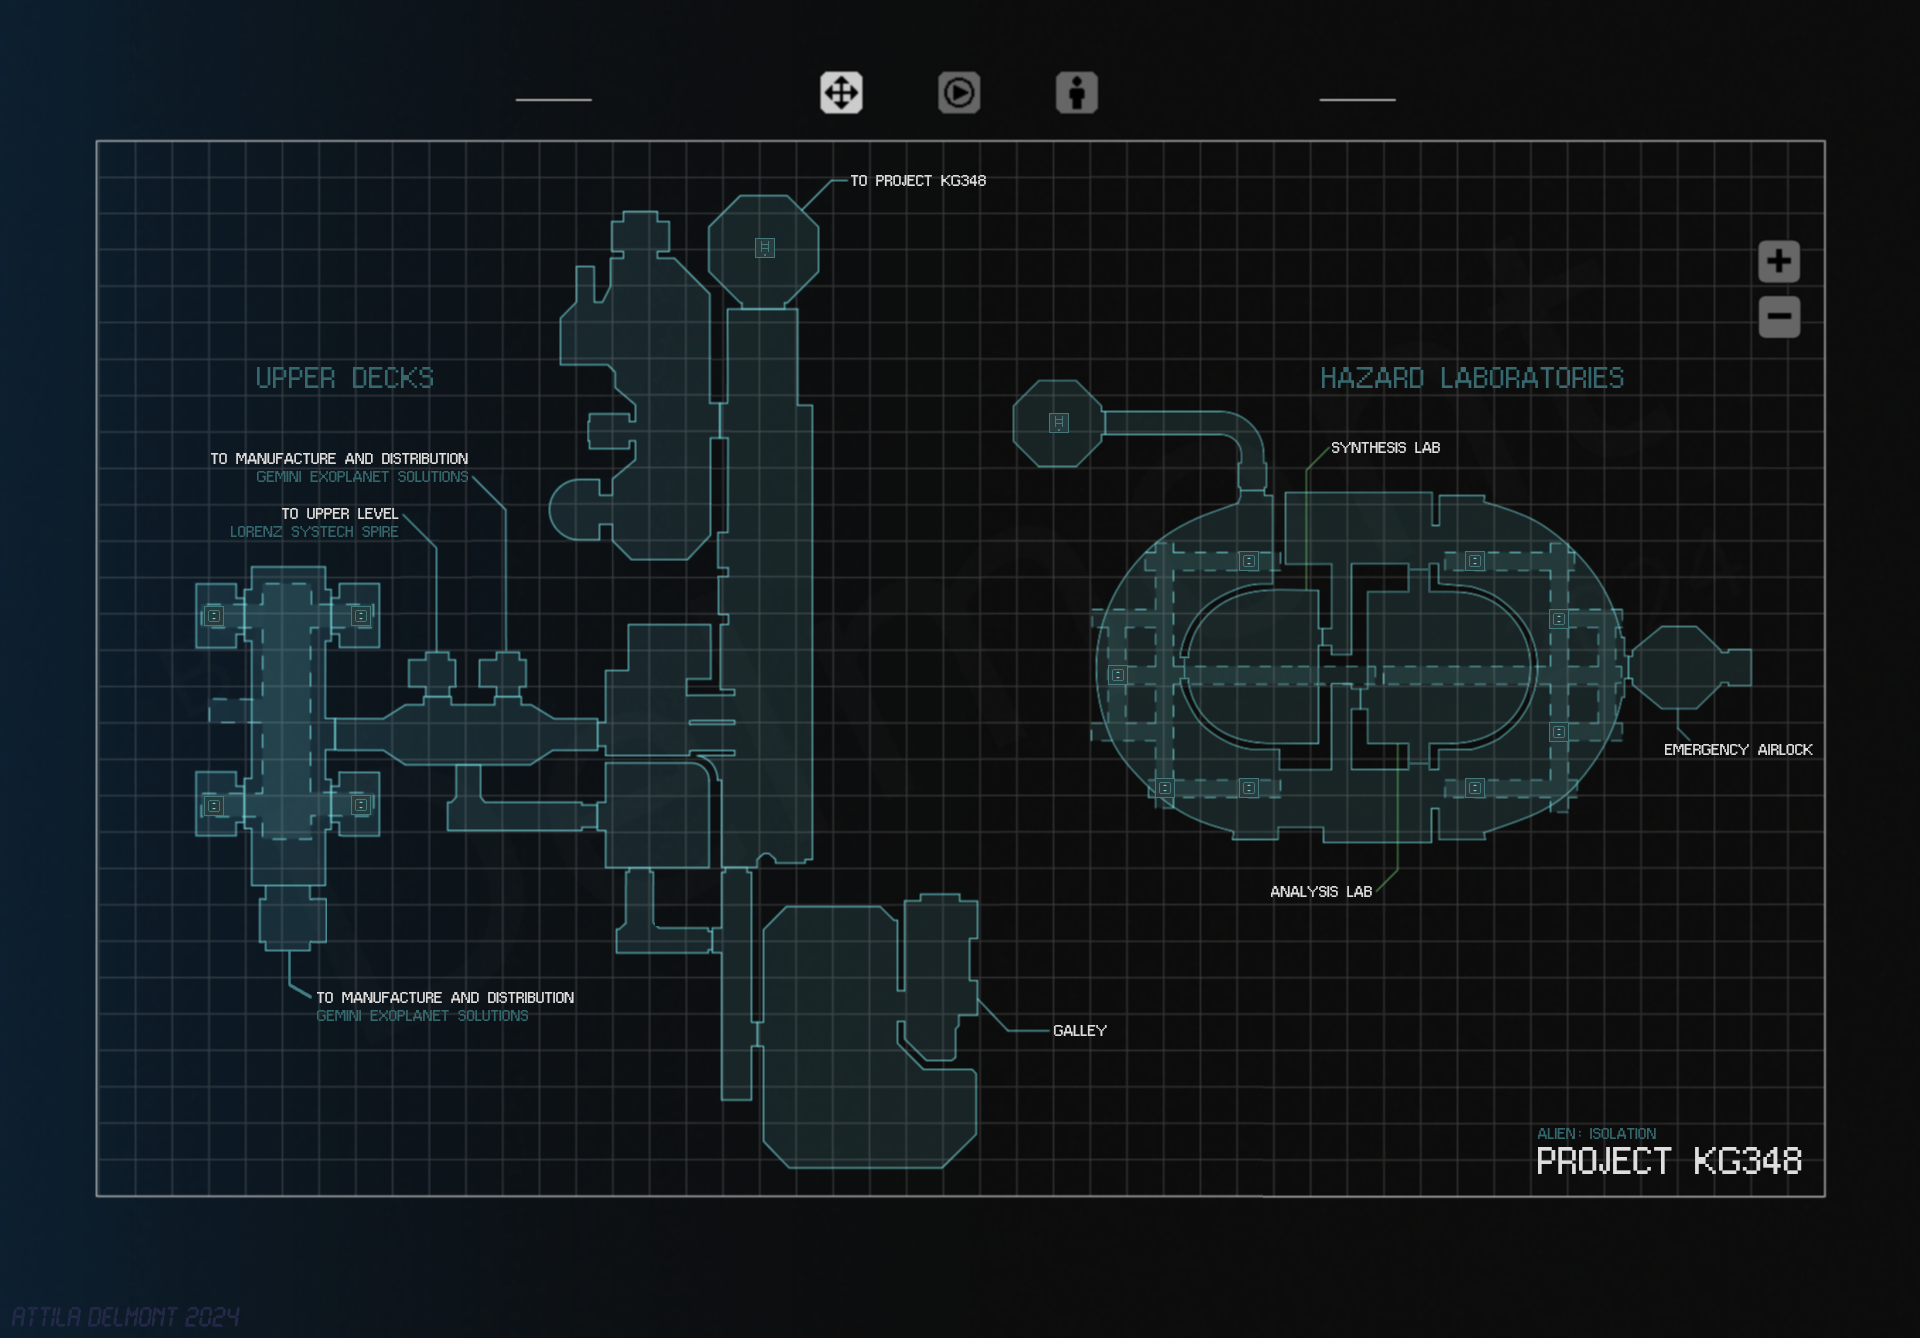
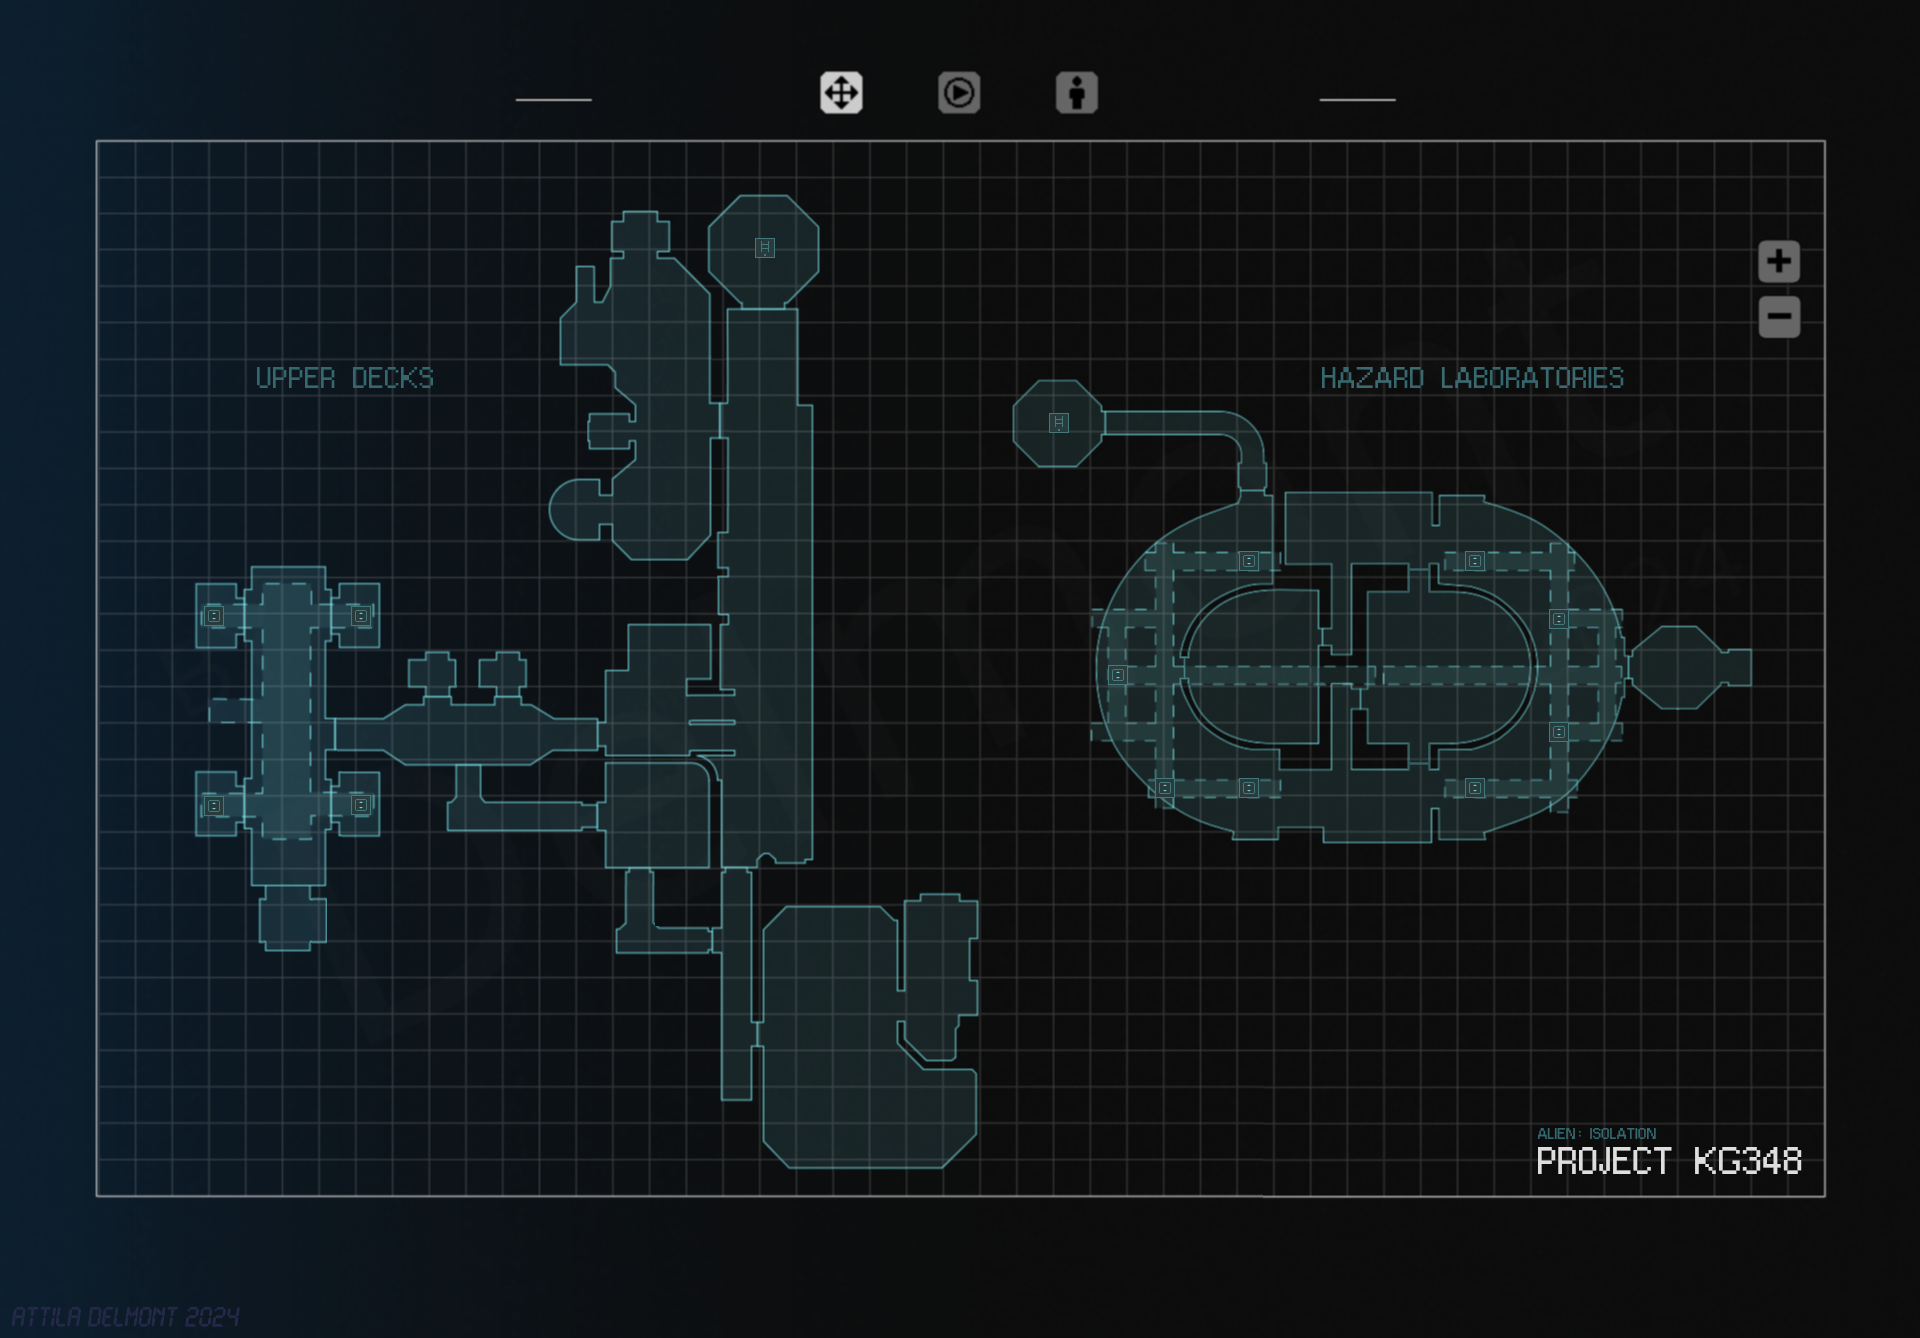
- Project KG-348
Hazard Laboratories, Upper Decks - ID tags: 1
- Solomons Habitation Tower
Galleria Lower Concourse - ID tags: 2


Solomons Habitation Tower: Galleria Upper Concourse - ID tags: 3


Solomons Habitation Tower: Upper Transit - ID tags: 1


Solomons Habitation Tower: Habitation Deck - ID tags: 1
- Apollo Core
Apollo Welcome Area - ID tags: 1


Apollo Core: Apollo Servers and Observation - ID tags: 3
- Engineering
Maintenance Deck - ID tags: 1


Engineering: Central Reactor - ID tags: 2


Engineering: Central Reactor Maintenance
- The Anesidora
Upper Decks, Lower Decks
- Station Maintenance
Upper Deck, Lower Deck - ID tags: 2
Legend Info
Other map guides
Check out these other Alien: Isolation map guides:


|iG| Vertigo - made this Sevastopol transit overview:
http://steamproxy.net/sharedfiles/filedetails/?id=402866213

MetroS.T.A.L.K.E.R - has merged all locations into one large map:
http://steamproxy.net/sharedfiles/filedetails/?id=394266374


APPENDIX
UPDATE 2024
  1. All maps revamped and cleaned up.
  2. All map images added to Steam guide (No more external image sources).
  3. Added Sevastopol Campaign Transit Overview map.
  4. Added icon-free (no legend) maps with and without labels.
  5. Added new icons and rebrushed classic icons.
  6. Added transit destination labels for trams, elevators, stairs etc.
  7. Added Campaign mission pointers to each map.
  8. Salvage- and Survivor -mode maps, was all drawn from scratch by hand, on top of a blank background screen dump. The same goes for map legend, icons etc.

LINKS

Please feel free to report any mishaps or flaws that I might have missed out on - And I'll gladly try and address them, thank you!

/AD


64 Comments
Valorin 13 Aug @ 9:35pm 
Absolutely awesome!
Also thanks for providing the empty maps. I'm gamemastering the Alien RPG and those maps might come in handy actually. :)
AstalaYstalawa  [author] 9 May @ 8:04am 
I'm all about nitpicking when it comes to topping this guide off with the best Transit Overview Map I can muster. I've put a lot if energy into this Guide, and I will most likely do very little updating in the future, if any at all!? - So your input is highly appreciated!

I've rearranged the Overview map once more from your pointers.

San Cristobal Medical Facility: I've assumed that the Crisis Stabilization Unit is above the Primary Care Floor ?
The Seegson Synthetics part is a bit messy, and might need some adjustments for better readability - But other than that, I'm pretty satisfied.

In regard to my remarks on the Lorenz Systech Spire Lobby and Technical - I meant the ingame map/level itself.
When arriving at the transit station, the map says Upper Level - And on the upper part of the Lobby, the map says Lobby and Technical - Which just seems odd?! So I switch the names around in my map.

Thanks again...
BigDamnHero 8 May @ 11:19pm 
And Station Maintenance is above Arrivals and Departures with Freight Shipping below. If you look at the "Interactive map of Sevastopol" the docking rig is the big arm sticking out (mostly dismantled when the game takes place) and the big windows just behind are for the Passenger Lounge. The Umbilical Controls are in that smaller set of windows to the left and above the docking arm. When Amanda is taken near the end of the game she wakes up close to the transit line and finds her way back down to the docking platform.

The Maintenance Deck is above the Central Reactor (just below Apollo Core), and the Central Reactor Maintenance with the nest is all the way at the bottom. In the original ending of the game, Amanda has to return through the nest (which has grown) to deactivate the Gravity Anchors at the very bottom of the station to destabilize its orbit.

But, again, minor nitpicks that only me a few diehards would ever care about. Really cool that you made these for the game!
BigDamnHero 8 May @ 11:18pm 
No problem. I know entirely too much about this game. Looks good! I don't see what you changed with the Lorenz, but everything looks correct.

The only other thing would be a few minor nitpicks with the placement on the transit map. The Habitation Deck would be below the Solomons Upper Transit. There was originally a Corporate Penthouse area, but that was cut from the final game and the Habitation Deck that made it into the game is definitely not the penthouse anymore. Amanda is heading down from Upper Transit when her elevator gets stuck and she ends up halfway in the Habitation Deck.
AstalaYstalawa  [author] 7 May @ 3:14pm 
Hi @BigDamnHero

I was actually a bit baffled about that, when I finally after 10 years, made the Transit Overview map, but didn't really pay that much attention to it - But it makes total sense now!

I've updated the Transit Overview by your suggestions and will modify and rename the maps in question and restructure the guide ASAP.

Really valuable feedback - Thanks a lot...

Seems to be a similar thing with Lorenz Systech Spire, Lobby and Technical and the Upper Level !? - I took the liberty to switch those, which seems more logical.

Cheers
BigDamnHero 7 May @ 11:14am 
These are really well done! Glad I finally stumbled upon them.

As I was going through them I did find a small problem. What you have labeled as the "Solomons Habitation Tower Habitation Deck" is actually the "Lorenz Systech Spire Upper Transit", and vice versa. It is actually a typo in the tower location in the game for those maps, but the "corridor of death" is the Habitation Deck and where Amanda restores power to transit is Systech side of Upper Transit.

It is clear if you take a look at the top left of your transit map. In your map now, during M17 Amanda is riding three *sideways* elevators back and forth between the Systech Spire and the Habitation Tower, and inexplicably riding a transit car *downwards*. If you swap those locations into the right tower with the right name, then the elevators all go up-and-down and she crosses between towers in the transit car.

Hope that helps!
Total Atomic Annihilation 18 Apr @ 3:17pm 
fantastic stuff!
AstalaYstalawa  [author] 28 Mar @ 2:00pm 
Hi @Edistus

Added San Cristobal Medical Facility to it's own section.

The Survivor Mode map rotation, was actually to orient the maps in relation to the elevators, when I merged them into the 3-in-1 map - So they should be correctly oriented in relation to each other. I've kept the external links for the single maps in the bottom of each section, and I might update these in time - But for now, the 3-in-1 maps should suffice.

Thanks for the feedback, much appriciated...
Edistus 28 Mar @ 9:32am 
Dear AD,

On the right, in the link menu that points to all the map sections on the big left page, there's a missing link to the section "6 San Cristolbal Medical Facility".

The section itself is there on the big left page between the sections "5 Sevastopol Scimed Tower" and "7 Seegson Synthetics".

It's also nice that you've reduced the watermarks in the updated maps to make them easier to read.

Again, many thanks for your great work!

P.S. I noticed that in the DLC "Survival" mode called "Trigger", with the map "The Package", you flipped it horizontally & vertically for better orientation. Nice.
PorcoGonzo73 27 Mar @ 2:28am 
Just noticed the update you made to all your maps. Awesome work! Thank you!